Here I’ll show you how to make a blooming onion in the most delicious way possible!
For those on dedicated diets, your journey unfortunately ends here. For those who can’t wait to wrap their chops around some questionable calories, welcome. And in turn, welcome to the most delicious form of fried onion you’ll ever taste. Onion rings, you were so last year.

Blooming Onion
I don’t know about you, but when I first laid my eyes on a blooming onion, I thought ‘how the heck do you make that!?’. But you know what, after a little research and a little (a LOT!) of testing, I’ve come to realise it’s not all that difficult.
What Onion to use?
You’re just looking for a regular large white onion. Try and get your hands on a ‘cannonball onion’ (in the UK they sell them in Morrisons). Any sort of sweet onion varieties like Vidalia will do the trick.
Essentially you want to find the largest one you can get your hands on though. I’m all for ‘good things come in small packages’, but in this instance bigger is certainly better. The bigger the onion, the bigger the petals and the less chance they’re going to turn into wilted crispy bits of batter when they’re fried.
How to cut a Blooming Onion (process shots)
- Peel onion then cut off the very tip (not the root).
- Flip the onion cut side down.
- Begin slicing about 1/2 inch away from the root. I find it easiest to do 4 quarter slices, then about 3-4 times in between. You should be able to make about 12-16 slices, depending on the size of the onion.
- Flip the onion back over, then gently spread out the petals.

Blooming Onion Batter
When it comes to coating the onion you’ll need two large bowls:
- Flour – This is not only what will give the blooming onion that crispy exterior, but it’s also an opportunity to inject some flour. In with the flour I add cayenne, paprika, oregano, garlic powder, salt & black pepper.
- Milk & Egg – This is what helps the flour stick to the onion in order to build up a thin crust. The egg is what does the sticking, whilst the milk ensures it’s thin enough to get in all the cracks and crevices of the onion.
The aim of the game is to really ensure you get in and around as much and as many of the petals as possible. There’s no way around this, it’s gonna get a little messy, but it’s worth taking the time to properly coat the onion.
The second thing to remember is after each coating, make sure you shake off excess flour/egg. This will ensure your blooming onion petals don’t stick together and become clumpy.
Process shots: whisk spices into flour (photo 1), coat onion (photo 2), whisk eggs and milk (photo 3), coat onion (photo 4), place back into the flour (photo 5), coat again (photo 6).

Deep Fried Blooming Onion
When it comes to deep frying the onion, there’s a few things to consider:
Tips for deep frying a blooming onion
- Oil – You want to use an oil with a high smoking point like sunflower, vegetable or canola oil. Do not use olive oil, it will smoke out the kitchen! You also want to make sure you’ve got enough oil to comfortably cover the size of the onion.
- Pot – You want a pot that’s large enough to fit the onion. Take into consideration the oil will rise fairly considerably as you place in the onion, especially as it vigorously bubbles in the first instance.
- Temp – Important the oil is hot enough when you place in the onion. You want it 180C/350F. Any lower and you risk the onion soaking up too much oil and going soggy. The oil temp will drop when you add the onion, but just maintain it as best you can.
- Face Down – I like to place the onion in face down and fry for a few mins, then flip it over and fry until cooked through. I find frying it upside down helps any trapped flour fall out of the core of the onion. It also ensures the ends of the petals fry properly, as they can often poke out the top of the oil once flipped.
The main thing is just to be incredibly careful whilst frying the onion. Use a strong ladle, lower it in very slowly and don’t take your eye off it!
Process shots: add onion to hot oil (photo 1), flip and fry until golden crispy (photo 2).

Blooming Onion FAQ
Can you bake a blooming onion?
I have actually tested this, and whilst there are plenty of recipes that offer a recipe for a baked blooming onion, in my opinion it’s no where near as crispy as when fried.
Do I have to freeze the onion before frying?
Some recipes suggest freezing the onion after you’ve coated it. I have tested this but found minimal difference in the outcome.
What dip to serve with a blooming onion?
My favourites are Sriracha Mayo, BBQ Mayo and Sweet Chilli Mayo. Check out all my Delicious Dips for inspiration though!

Serving a Blooming Onion
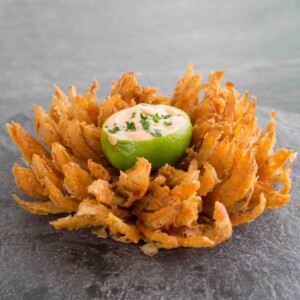
Once it’s fried, you’ll want to drain it on some paper towels. I like to finish with a good pinch of salt to draw out any final moisture.
Mini dipping bowl
I like gut out a lime and use it as a dipping bowl. You could also use a small glass pot if you’re not as extra as me 😂
Looking for more fried onion goodness? Check out my Beer Battered Onion Rings!
Alrighty, let’s tuck into the full recipe for this blooming onion shall we?!

How to make a Blooming Onion (Full Recipe & Video)
How To Make A Blooming Onion
Equipment
- Deep Pot & Slotted Spoon (for deep frying)
- Sharp Knife & Chopping Board
- 2 Medium/Large Sized Mixing Bowls
- Paper Towels
- Kitchen Thermometer
Ingredients
- 1 large White Onion (see notes)
- 1.5 cups / 225g Plain White Flour
- 1/2 cup / 125ml Milk
- 2 Eggs, beaten
- 1.5 tbsp Paprika
- 1.5 tsp EACH Salt, Cayenne Pepper, Garlic Powder plus extra salt to sprinkle for serving if desired
- 1 tsp Oregano
- 1/2 tsp Black Pepper
- 4-8 cups/1-2 litres Oil, or as needed to cover the size of the onion (something with a high smoking point like Vegetable, Sunflower, Rapeseed, Canola)
Instructions
Slicing
- Make a tiny slit across the tip (not the root) of your onion and peel the brown shell away.
- Place the onion with the root facing up. With a knife, begin slicing around 1/2 inch away from the root in a circular motion. You should be able to create 12-16 even slices depending on the size of your onion.
- Flip the onion and gently spread out the petals.
Coating
- In one bowl combine flour, paprika, cayenne pepper, oregano, garlic powder and salt & black pepper. In a second, combine eggs and milk.
- Place the onion in the dry mix, spread out the petals and thoroughly coat, ensuring you coat as much of the onion/petals as possible. Shake away excess flour, then place into the wet mix. Coat again, ensuring you get right in between the petals. Allow excess to drip off then place back into the flour. Coat once again, ensuring you thoroughly coat each petal, carefully spreading them out as needed and shaking out any excess so the petals don't clump together. This is a tedious process but worth it to ensure each petal has a good coating and also don't all stick together.
Frying
- In a suitably sized pot, heat up enough oil to cover the depth of the onion. You want to get it to about 350F/180C. Drop a petal in and if it vigorously sizzles, you're good to go. Using a ladle, slowly and carefully drop in your onion root side up. Allow to fry for around 2-3mins, then very carefully flip it over. It's ready to flip when the very tips of the petals begin to lightly char.
- Continue frying until deep golden and visibly crispy all over. Depending on the size of your onion it should take around 6-10 minutes until done. You don't want to pull it out early as the batter with taste flakey/powdery, so ensure it's a deep golden colour before it comes out. Try and keep it submerged in the oil throughout and keep it on a high heat to try and maintain the oil temp as best possible.
- Place upside down on a paper towel to drain. Flip then sprinkle another pinch of salt. Serve with your favourite dip!
Video
Notes
Your Private Notes:
Nutrition
Looking for more?
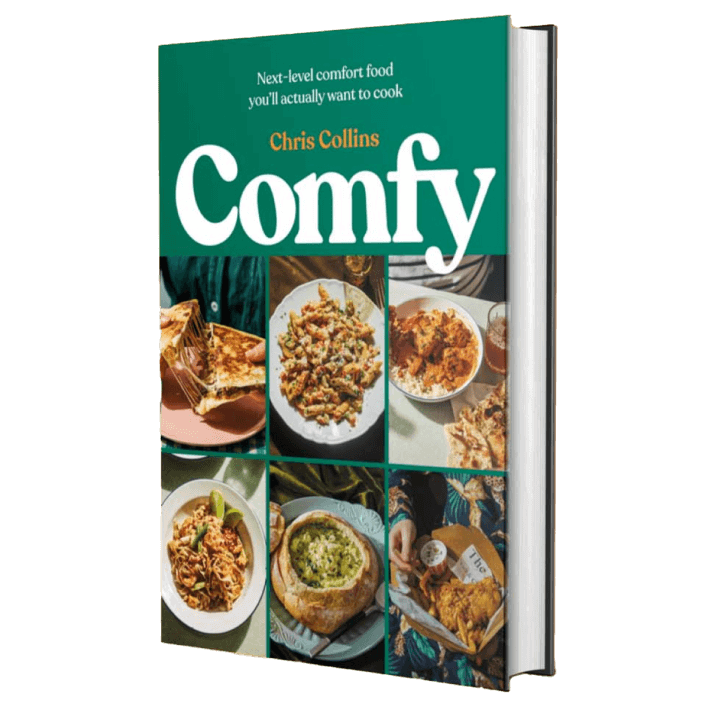
You’ll find plenty more delicious comfort food like this in my Debut Cookbook ‘Comfy’
If you loved this Blooming Onion recipe then be sure to Pin it for later! Already made it? Let me know how you got on in the comments below and pick up your free ecookbook along the way!


how much flour
1.5 cups / 225g (as stated in the recipe card). C.
So good! I didn’t even make dip and just ate them as is. I didn’t have enough oil to fill pot so I just fried batches of the petals
So pleased it went down well, Jessica! 🙂 C.
Soggy mess…Tried it again and just used Eggs as a binder ; it came out good that way..
Hi Barry! If just eggs works for you then go for that. I personally find the milk is needed to thin out the eggs and coat the onion more efficiently. I’ve also never found this to have an effect on the crispiness of the onion. C.
At the steakhouse I once worked, we would soak the cut onion in water overnight. This naturally would open the petals to make it easier to coat!
Will have to give it a try! C.
I loved the way southern people cut and deep fry an onion yall do amazing job thanks