Here I’ll show you how to make a restaurant-quality Pork Katsu Curry at home!
With a little help from my Japanese family, I’ve come up with a restaurant-quality katsu curry that uses simple store-bought ingredients. Follow me…
Homemade Katsu Curry Sauce
My brother and sister-in-law let me in on a secret – Japanese people rarely make katsu curry sauce from scratch. Which makes sense, because the pre-made blocks are so convenient and delicious over there, there’s really no need. Having said that, we did come up with a homemade curry sauce that truly rivals any pre-made sauce. Here’s what it’s made up of:
- Flavour base – sautéing some onion, carrot, garlic and ginger will give this sauce a solid base flavour.
- Spice/seasoning – the majority of the spice comes from curry powder, but I also like to add in some garam masala and turmeric.
- Sauce – the sauce itself is made up from chicken stock.
- Flavour boosters – some soy sauce will add some umami, whilst a dash of honey will add some sweetness to balance everything out.
- Thickening – the sauce is thickened with cornstarch/cornflour (mixed with water).
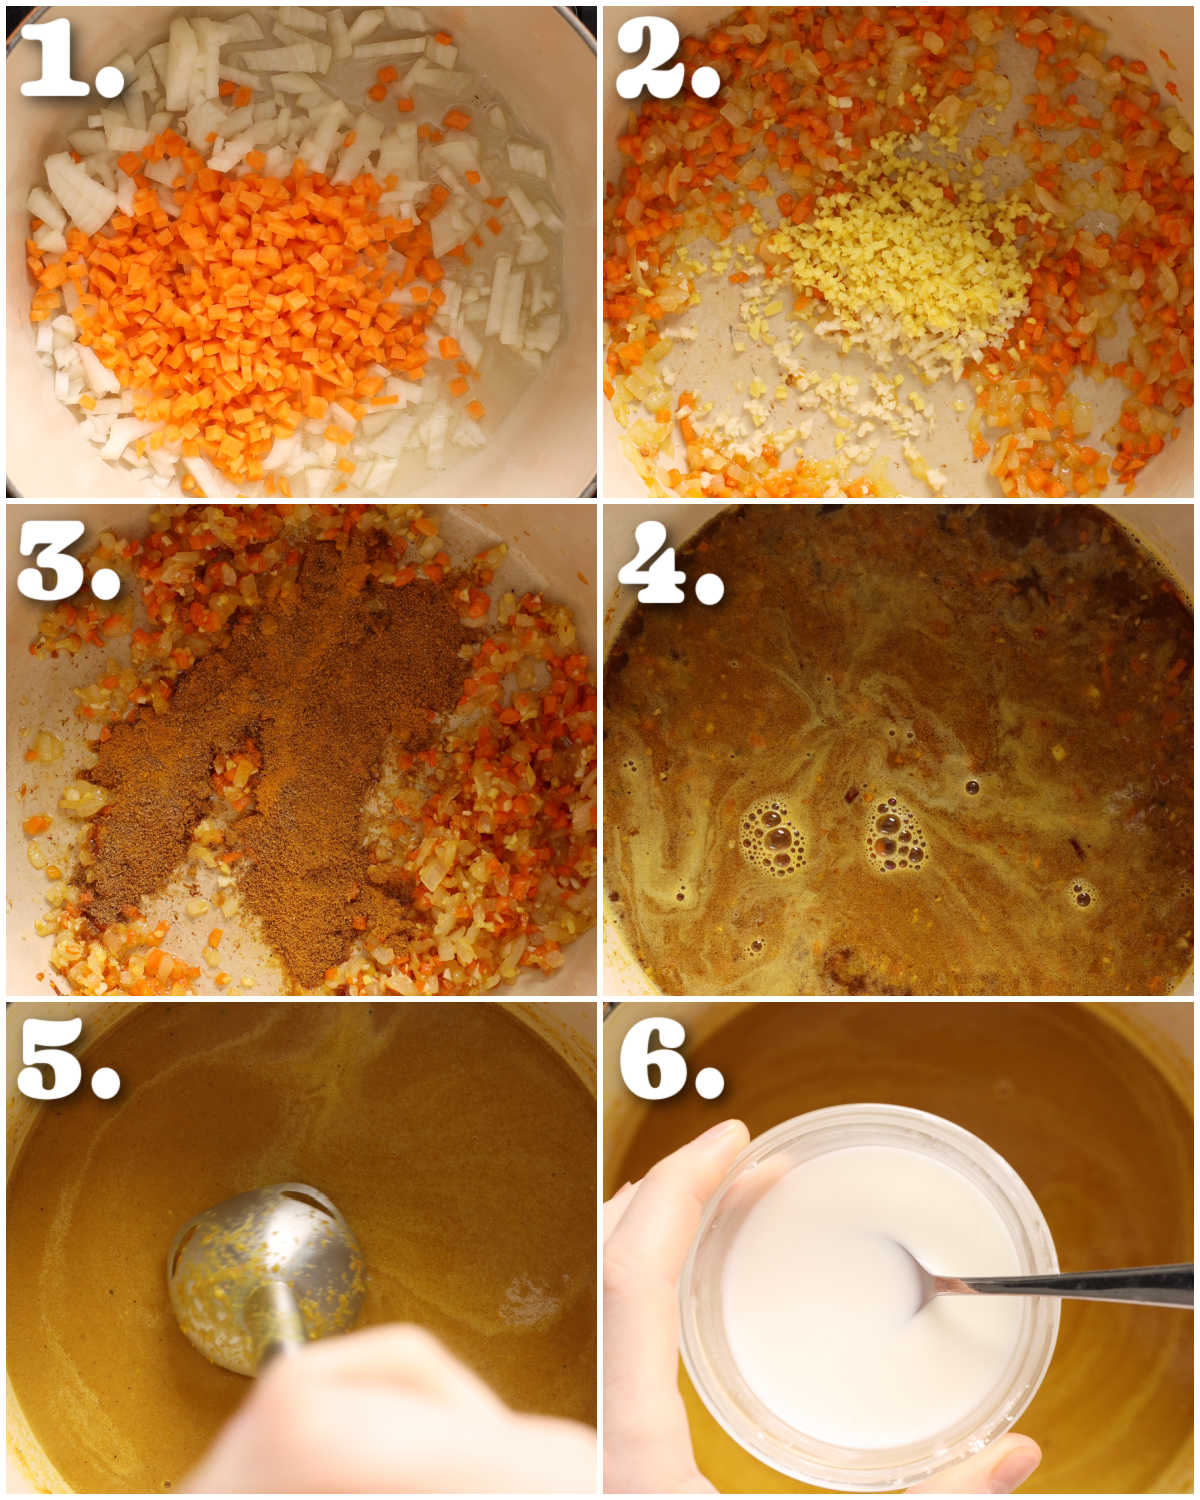
A lot of katsu sauce recipes leave the veg chunky (namely the carrots), but I prefer a smooth sauce. As such, I like to blitz everything with a hand blender.
Process shots: fry onion and carrot (photo 1), fry ginger and garlic (photo 2), fry spices (photo 3), add stock, soy sauce and honey (photo 4), blitz (photo 5), thicken (photo 6).
Pork Katsu
Pork gets a bad rep, but in this context, it’s truly the hero ingredient. For this recipe, we will be using boneless pork loin steaks, but boneless chops will work just as well. If the pork has a very thick strip of fat, you’ll want to remove it. If it’s not that aggressive, just score it with a nice (so it doesn’t curl as it fries).
Pounding the pork
One crucial step is covering the pork in cling film and using a rolling pin or mallet to pound it. Not only will this tenderise the meat, but it’ll also ensure the pork cooks through quicker and more evenly.
Dredging the pork
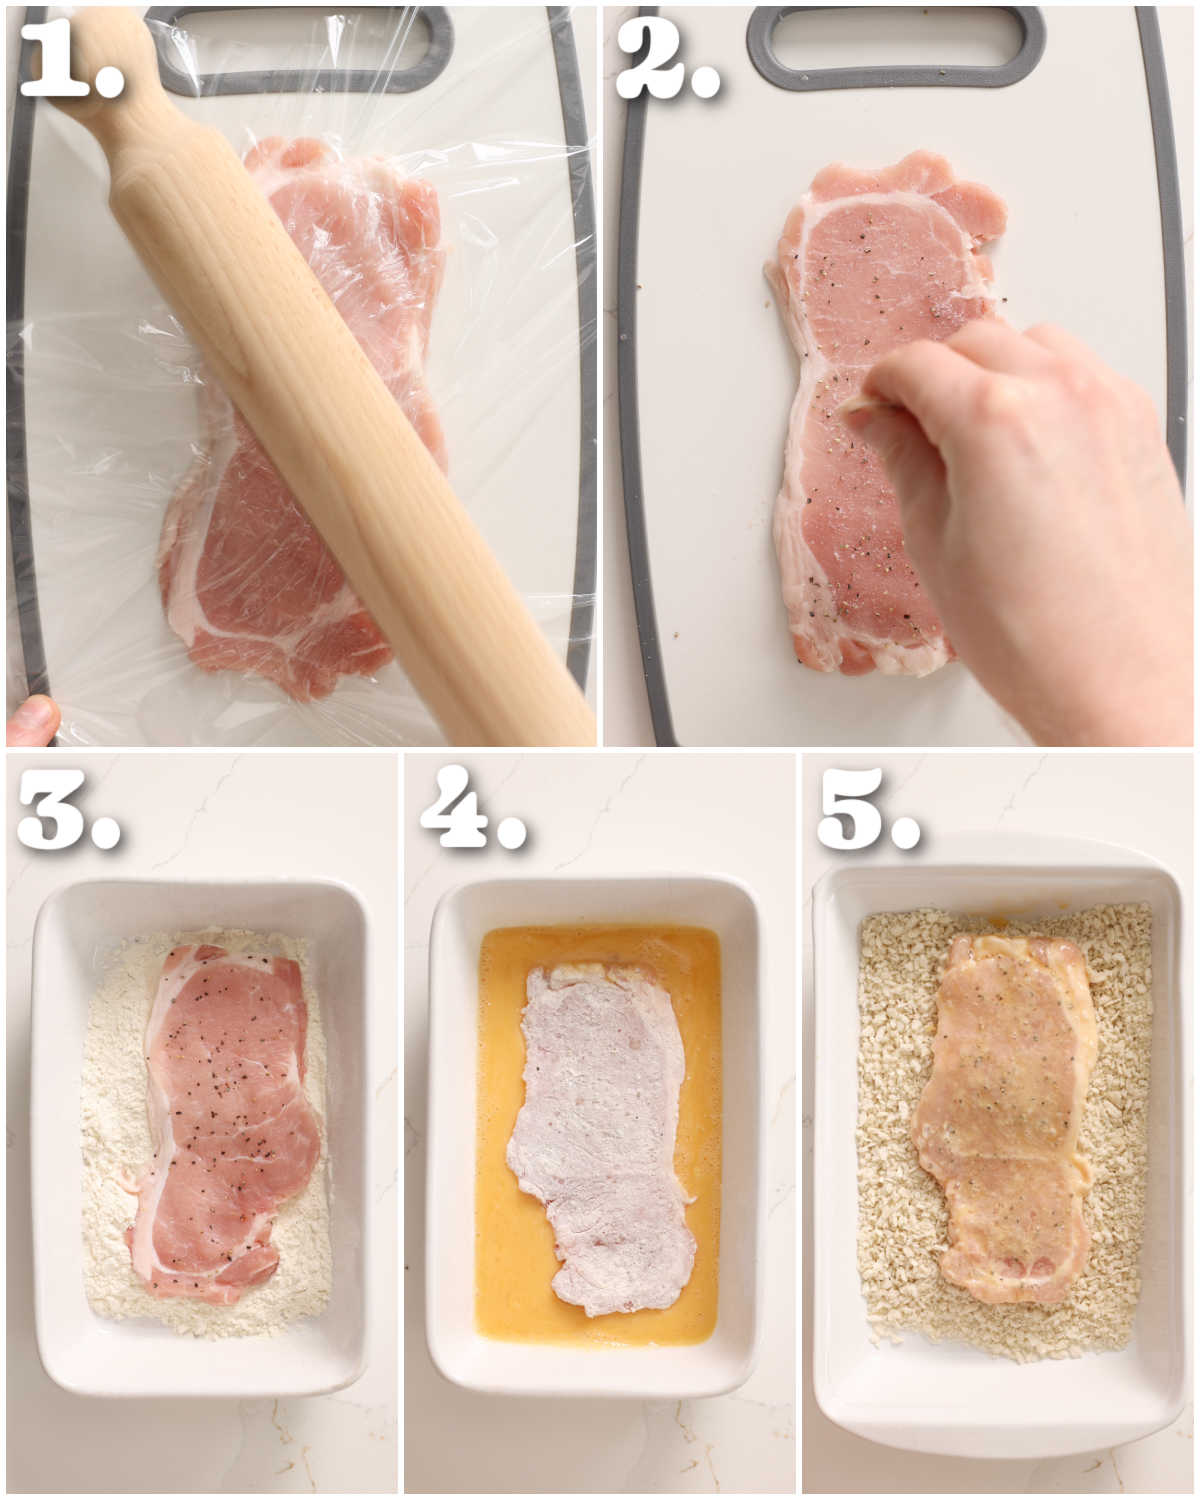
This is where the magic happens. The absolute key to any good tonkatsu (breaded/fried pork) is using Panko breadcrumbs. These are Japanese breadcrumbs that give the meat that iconic ‘crisp’ factor. Panko breadcrumbs are big and airy, so they crisp up really nicely. To attach the breadcrumbs, we’ll be dredging the pork through flour, then egg first.
Process shots: pound pork (photo 1), season (photo 2), coat in flour (photo 3), coat in egg (photo 4), coat in Panko (photo 5).
Recipe Tip
You’ll find Panko Breadcrumbs in most supermarkets in the Asian section.
Frying the pork
For truly crispy tonkatsu, you do need to fry it. However, we’ll only be shallow frying it, not deep frying. Meaning you’ll use a lot less oil and it’s much less intimidating.
Resting the pork
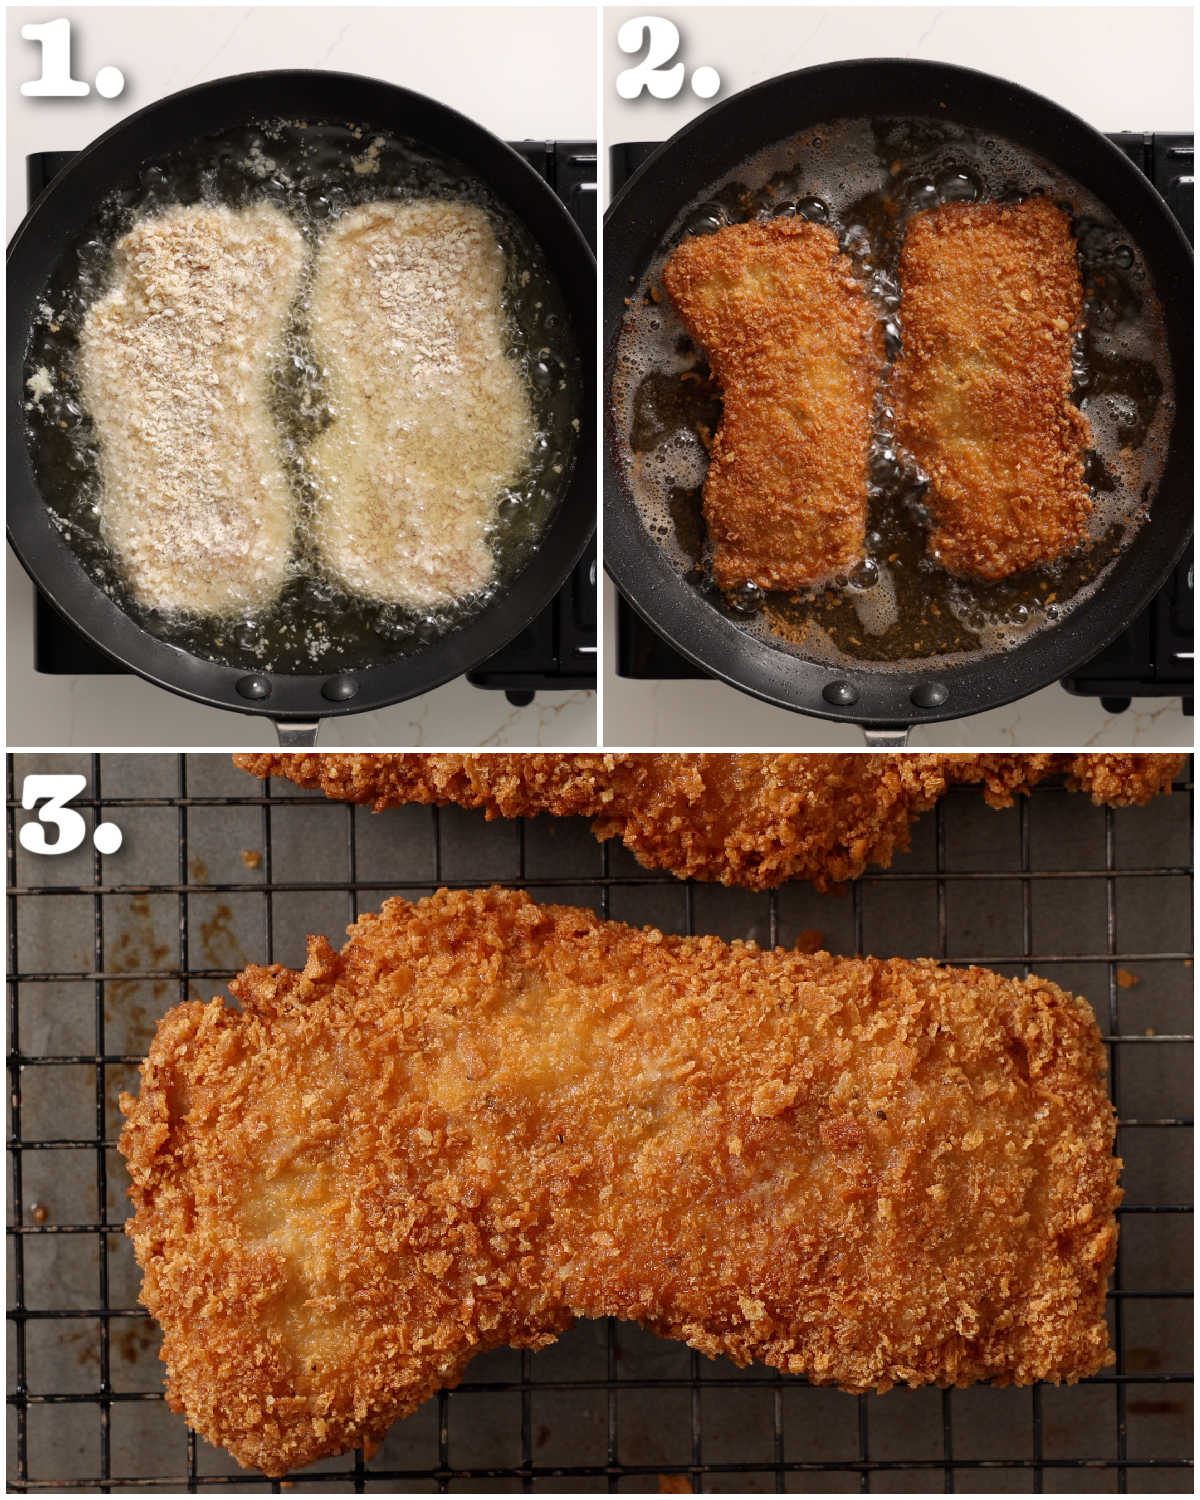
Once the pork is deep golden and crispy on both sides, you’ll want to rest it on a wire rack (preferably above a tray to catch excess oil). I like to then go in with a final pinch of salt, just to pull out the final bit of moisture from the crumb.
Process shots: add pork to oil (photo 1), fry (photo 2), rest (photo 3).
How to serve Pork Katsu Curry
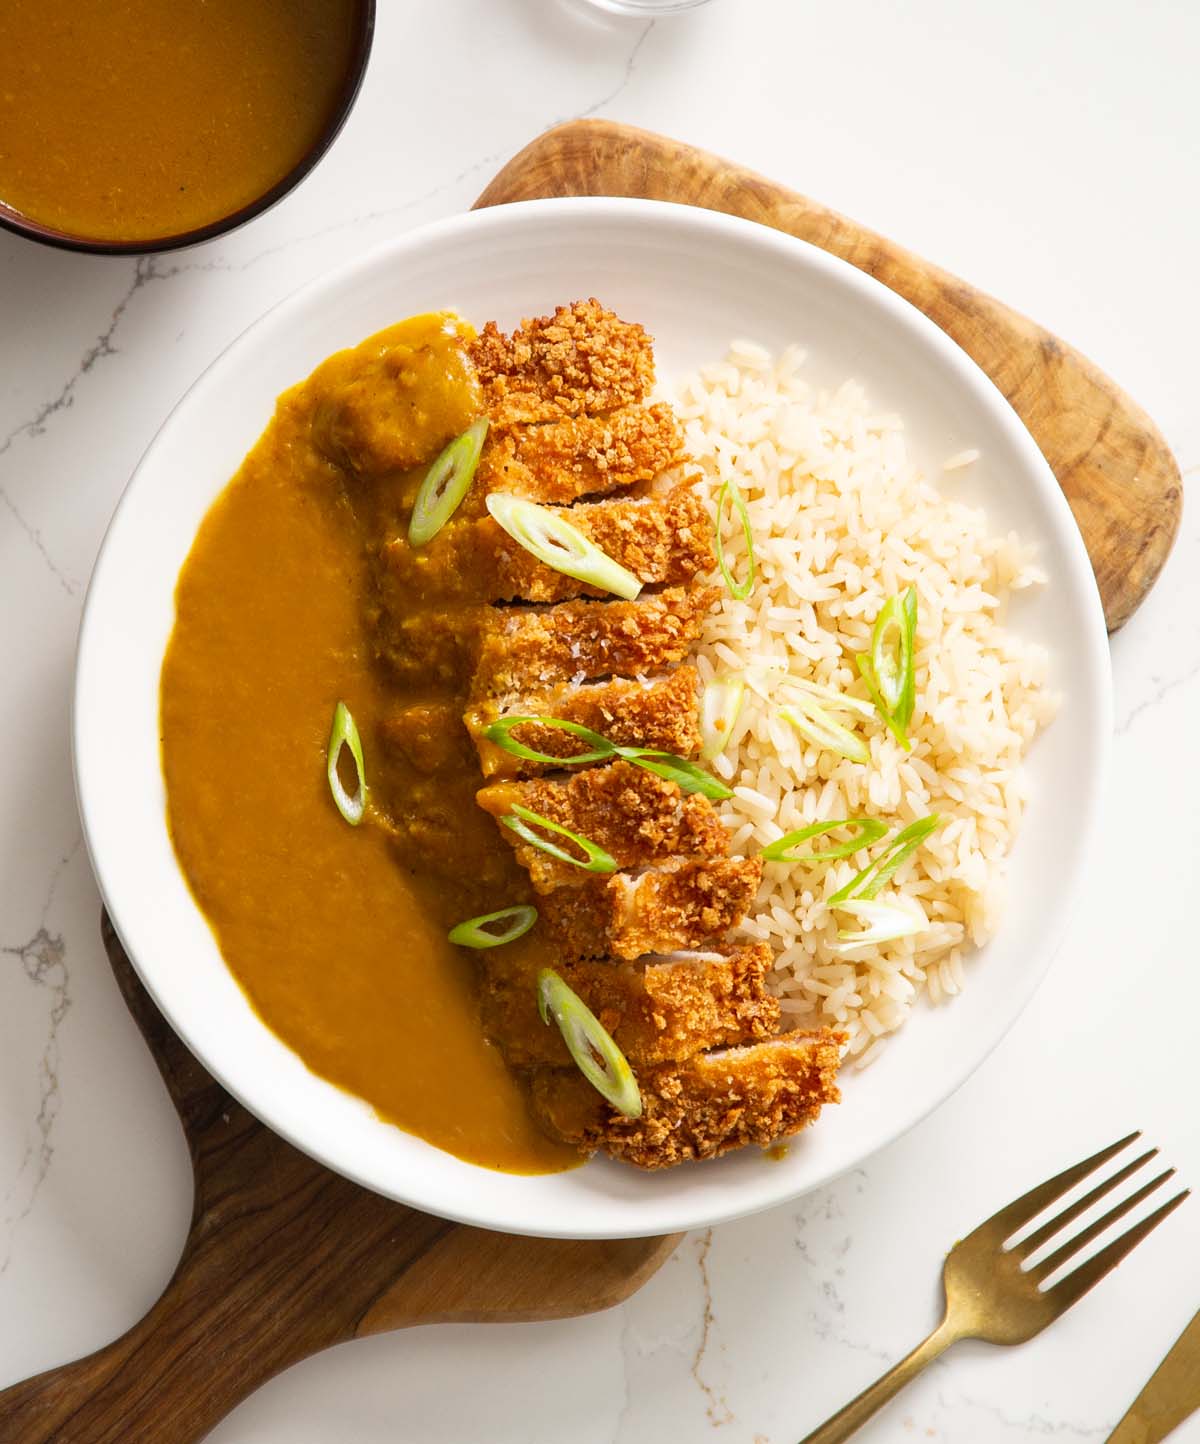
The pork definitely needs to be sliced, and there definitely needs to be rice. I like to rest half of the pork on the rice, then pour the curry sauce over the other half (picture below).
Some other things that wouldn’t be uncommon to serve with it would be very finely shredded cabbage and fukujinzuke (pickled veg). Here I’ve opted for some thinly sliced spring onion, which isn’t traditional, but it works nevertheless.
Alrighty, let’s tuck into the full recipe for this pork katsu curry shall we!?

How to make Pork Katsu Curry (Full Recipe & Video)

Pork Katsu Curry
Equipment
- Sharp Knife & Chopping Board
- Medium Sized Saucepan (for sauce)
- Wooden Spoon
- Cling Film & Rolling Pin or Mallet (for pounding pork)
- 3 Large Shallow Dish (for dredging pork)
- Large Heavy-Based Pan & Tongs
- Wire Rack & Baking Tray or Paper Towels (for resting fried pork)
Ingredients
Pork Katsu
- 4x 150g/5oz Pork Loin Steaks (see notes)
- 50g / 1/3 cup Plain Flour
- 100g / 3.5oz Panko Breadcrumbs
- 240ml / 1 cup Vegetable Oil (or another oil with a high smoking point)
- Salt & Black Pepper, to taste
Curry Sauce
- 2 tbsp Vegetable Oil
- 1 medium White Onion, finely chopped
- 1 medium Carrot, finely chopped
- 3 cloves of Garlic, finely chopped
- 2 tsp finely chopped Fresh Ginger
- 1 tbsp Curry Powder (spice level of choice – I use medium)
- 1 tsp Garam Masala
- 1/2 tsp Ground Turmeric
- 500ml / 2 cups Chicken Stock
- 1 1/2 tsp Light Soy Sauce
- 2 tsp Honey
- 2 tbsp Cornflour/Cornstarch
- 2 tbsp Cold Water
- Salt & Black Pepper, to taste
To Serve
- Rice
- sliced Spring Onions (optional)
Instructions
- First, make the sauce. Heat the oil in a saucepan over a medium heat. Add the onion and carrot and fry until softened and the onion just starts to turn golden. Add the garlic and ginger and fry for a further minute, then stir in the curry powder, garam masala and turmeric and fry for another minute. Add the chicken stock, then stir in the soy sauce and honey. Turn the heat to low and use a hand blender to blitz until smooth.
- In a small bowl, stir together the cornflour and the cold water, then swiftly whisk it through the sauce. Simmer and stir until the sauce thickens, then season with salt and pepper if needed.
- To make the pork katsu, use a knife to remove the thick strip of fat attached to each pork steak. Lay a sheet of cling film over them and use a rolling pin, mallet or another heavy object to pound them to around 1.5cm thick. Season both sides of each steak with salt and pepper.
- Line up three large shallow dishes: the first with the flour and a large pinch of salt and pepper, the second with the beaten eggs and the third with the breadcrumbs and a large pinch of salt and pepper. One by one, coat the pork steaks in the flour, then the egg and then the breadcrumbs. Make sure you thoroughly coat the pork at each stage.
- Heat the oil in a large, heavy-based saucepan over a medium heat until it reaches 180°C (356°F). When it's hot enough, a breadcrumb should rapidly sizzle when it hits the oil. Two at a time, fry the pork in the hot oil for around 3–4 minutes each side, or until deep golden and visibly crispy, with the pork piping hot through the centre and with no trace of pink. Rest the cooked pork on a wire rack set over a baking tray or kitchen paper to catch any excess oil.
- To serve, reheat the sauce and give it a whisk (add a dash of water if it over-thickens). Slice the pork into strips, place next to the rice. Spoon the sauce alongside the pork, then garnish with chopped spring onions, if using. Tuck in and enjoy!
Video
Notes
Your Private Notes:
Nutrition
Looking for more?
You’ll find plenty more delicious comfort food like this in my Debut Cookbook ‘Comfy’